Google Earth is a popular software to view world satellite image, sometime you might want to add it’s image into the SAGA GIS software and overlay few Shapefile or other GIS data. So I have wrote a tutorial which will guide you step by step to georeference Google Earth image in SAGA GIS.
Step1. I am assuming you have downloaded SAGA GIS and Google Earth in your computer.
Step 2. Open the Google Earth and zoom into the area of interest, for this tutorial I am taking a random place. You can download the image that I have used for this tutorial and also below coordinates table that you will use during exercise.
| Point | Longitude (X) | Latitude (Y) |
| 1 | -114.395181 | 51.311713 |
| 2 | -114.357902 | 51.313700 |
| 3 | -114.389132 | 51.295705 |
| 4 | -114.361178 | 51.292948 |
Step 3. To make Google Earth coordinates number easy, change it to the Decimal Degrees.
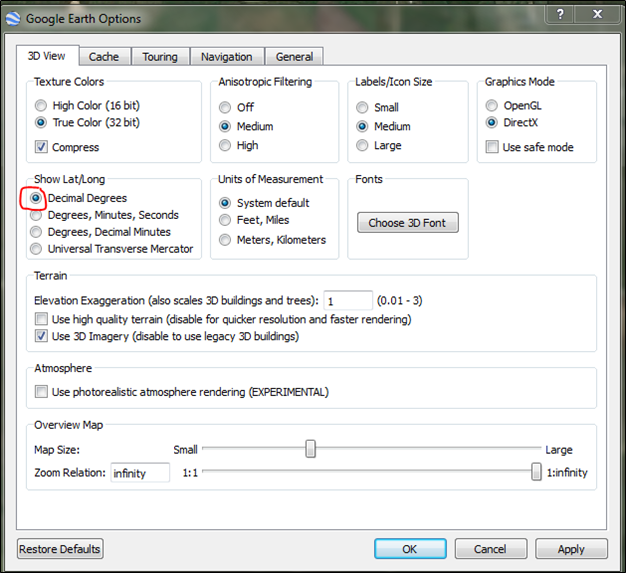
Step 4. Now add four random place mark on the image; later it will be used as reference points. I have numbered them from 1 to 4, see below image.

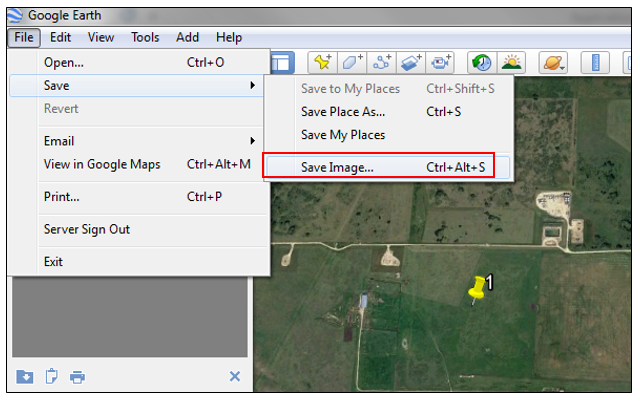
Step 5. Then go to File > Save > Save Image; then assign the file name and press Save.
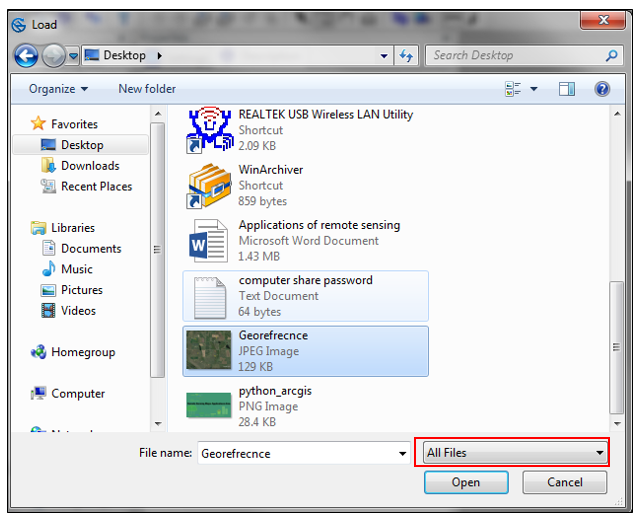
Step 6. Now open your saved image into SAGA software, for that go to File> Open. Change the file type to “All files”, then select your Google Earth image. In our case file name is “Georefrence.jpg”.
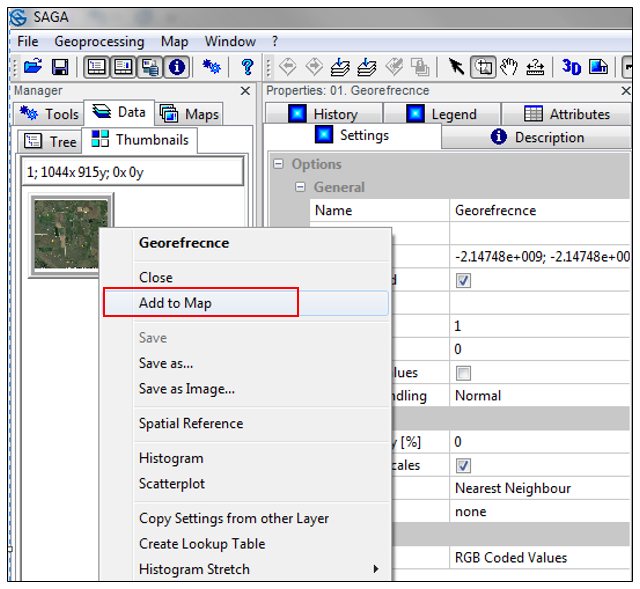
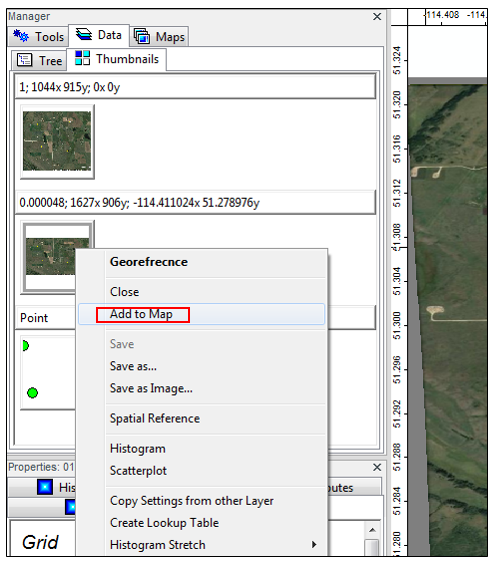
Step 7. Now select the Thumbnail image and click on Add to Map. Image will be displayed on the Map window.
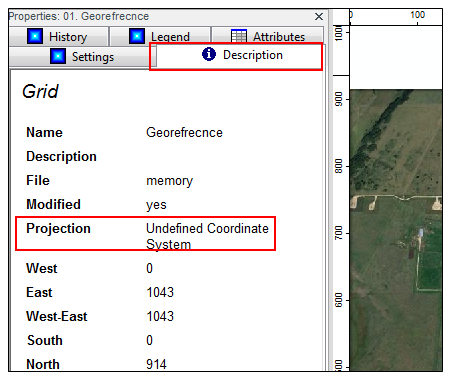
Step 8. Image is missing the projection coordinate system, if you click on the description tab you will notice that. Google Earth is on WGS 84 projection.
Step 9. Again go back to Google Earth software and note down coordinate points of 4 place marked, to do that select each points and click on the Properties.
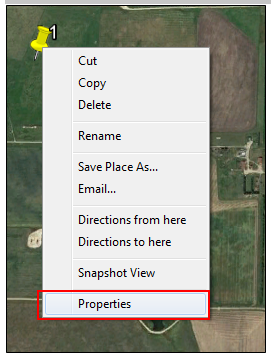
Step 10. Then copy the longitude (X) and latitude (Y) on your notepad. I have listed on the below tables and you can use these coordinates if you have downloaded our exercised image.

| Point | Longitude (X) | Latitude (Y) |
| 1 | -114.395181 | 51.311713 |
| 2 | -114.357902 | 51.313700 |
| 3 | -114.389132 | 51.295705 |
| 4 | -114.361178 | 51.292948 |
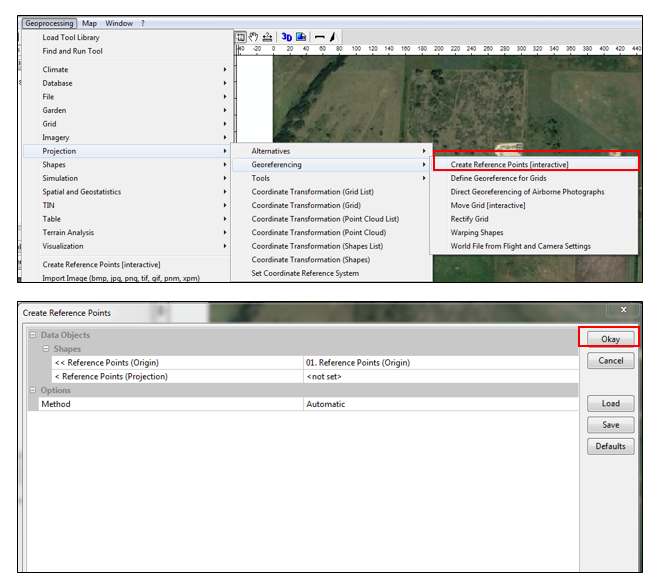
Step12. Again come back to SAGA software, Click on the Geoprocessing > Projection > Georefrencing > Create Reference Points. Then Create Reference Points window Opens, click Okay to edit the GCP (Ground Control Points).
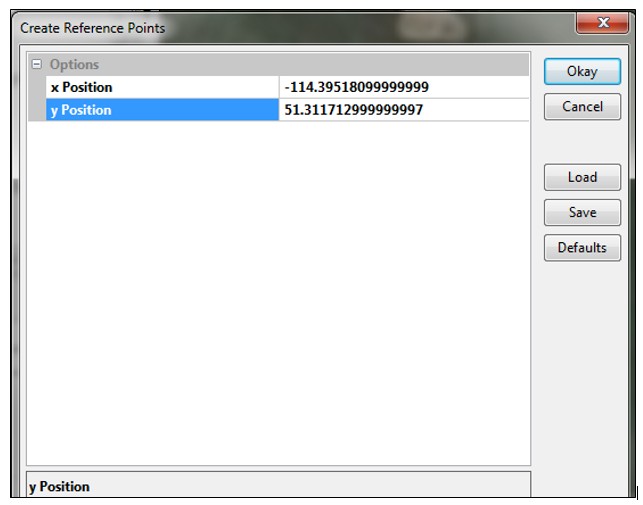
Step13. Select the Action button and click on the “1” icon that is on image. Create Reference point window opens, fill X and Y value listed on the above table. Note, X is the longitude and Y is the latitude and then Press Okay to register the point. If you notice on the description tab, you will see registered coordinates.

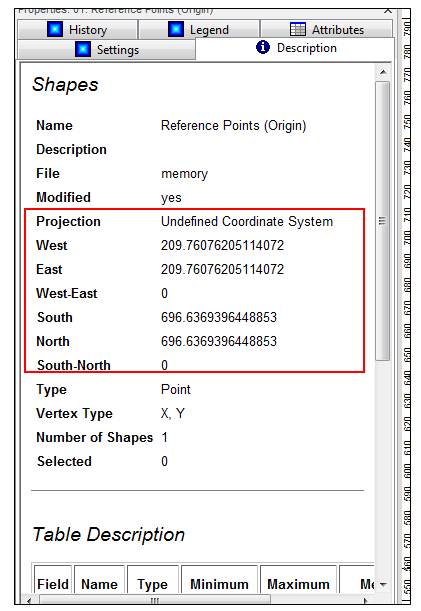
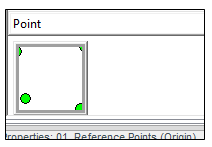
Step14. In the same way register the remaining 3 points on the map. We have added 4 points on the map to reference it, you will notice on the reference points thumbnail. If you right click it and click on the show, it will display the attribute table of 4 registered points.

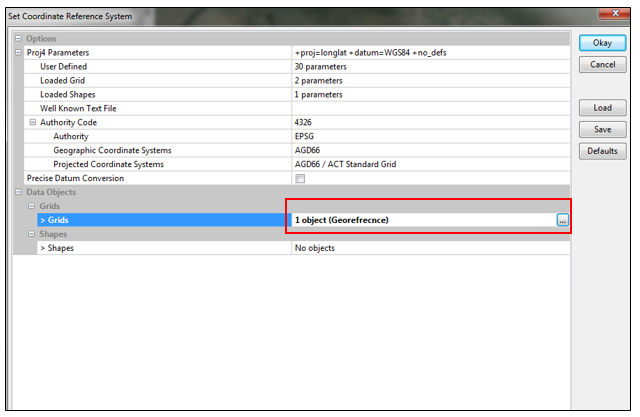
Step15. Next steps are to assign the coordinate system, first of all check off the “Create Reference Points” and then press Okay.

Step16. Now go to the Projection > Set Coordinate Reference System

Step17. As we have already taken WGS 84 coordinate system ( if it does not show then you can browse and add WGS 84), you just need to assign the GRID object. Select the Georefrence file that we are working on this tutorial, then press Okay.
Step18. Now we need to rectify the image for permanence of points, Go to Geoprocessing > Geoerefrencing > Rectify Grid
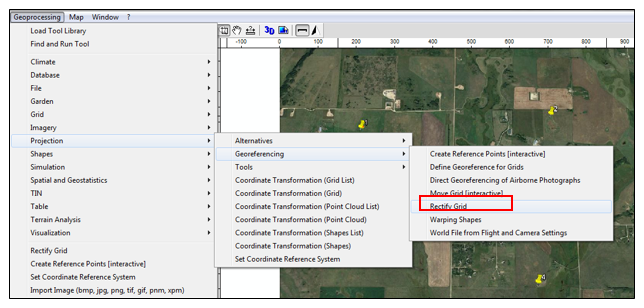
Step19. Then assign the value as shown in the below, Select the “reference points” under Reference Points (original) and under the Grids assign both the column. You can select any resampling technique. Then press Okay, which will add new rectified image on the manager window.

Step20. You will notice new image is added on the Manager window, right click the image and click Add to Map. This is your rectified georeferenced image.
Please do comment this tutorial so we can provide best to you.
NOW READ:10 Python ArcGIS Label Expression Code


