ArcGIS Table of Content is a place where all layers and Dataframes are kept. Organizing layers and Dataframes make your life easier while editing and designing. Following are some of Tips and Tricks that will help you to organize layers. Steps that are included here are from adding data till grouping layers. Hope this tips and tricks help speeding the mapping process.
1.Dataframe Editing
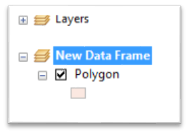
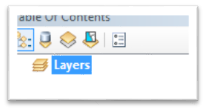 When you add the data in ArcGIS TOC, by default it creates a Dataframe called layers. Rename the Dataframe name (layers) by right clicking its properties and typing the text in general tab. Or you can highlight the Dataframe and press F2 or click and hold the Dataframe for few seconds, it will change into typing mode. When you have number of Dataframes in the TOC (Table of Contents) then naming them with the meaningful name makes easier during production mode.
Tips: When you add the layer to the blank Dataframe, it adds the coordinate system of the first layer. Make sure that your required coordinate system is added, you can cross-check it by right clicking the Dataframe and then to tab Coordinate system.
2.Layers Naming Convention
When you add the layers to the TOC (Table of Contents), it assign the name of the layer from its source layer name unless alias name is used. It is a good practice to provide alias name when you create shapefile or feature class in the geodatabase. If you have to rename the layer then try to assign name that reflects it’s feature, to do that you can type in the text by right clicking the layer -> properties -> General Tab -> Layer Name text box. Or you can highlight the layer name and press F2 or click and hold the layer name for few seconds which will change to the typing mode. Avoid using ASCII keys like !, @,# or * that might create confusion to readers and also create problem while exporting the map in the pdf format.
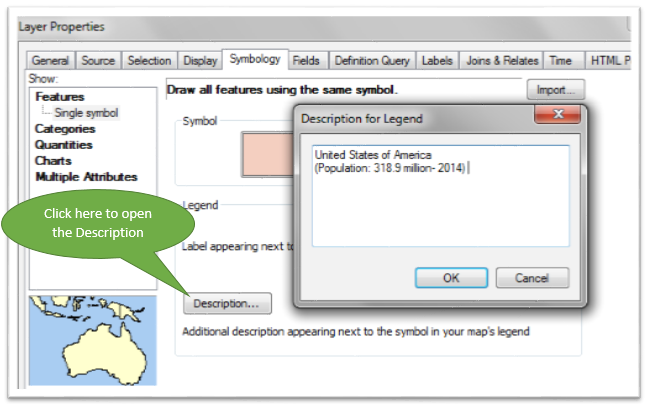
Tips: Sometimes layer name is too long and you want to display the text in two lines for the legend purpose. For that purpose use the description field to plot the name in the legend rather than using layer name option.
United States of America
(Population: 318.9 million- 2014)
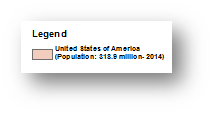
This is not possible by typing name in the layer name box. Go to layer proprieties > Symbology > click Description. Then type “United States of America” and press CTRL +ENTER to change the line. Pressing ENTER only will bring you back to properties window, so remember to hit CTRL +ENTER to change the line.
3.Points, Lines and Polygons arrangements
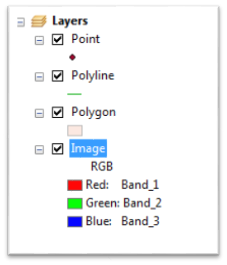
In the TOC (Table of Contents), the rule is, the data that is added first is last in the list. If the point layer is added first, then followed by the polygon layer. This will make the point layer unable to display on the view window because the polygon layer is hiding it. So the best way to solve this problem is to move the point layer above the polygon layer. Basic rule of thump for the TOC is to keep raster layer at the end, then polygon layer, then the polyline layer, and finally at the top the point layer. If you have to keep the polygon layer on the top of the point and the polyline, then there are two options. You can put no fill color for the polygon and thicken the boundary line or you can assign the transparency value ( right click the layer properties >Display > Transparent values) to the polygon layer. This transparency enable to see through the layer.
4.Grouping the Layer
The challenge for the student and the professional is to manage TOC when it is overloaded with layers. If there are 100s of layers and navigating to find the right on for editing or to work on it becomes time consuming and confusing. There are several ways to avoid overloading in the TOC. The first option is to create separate Dataframe where you keep layers that will be used for georefereincing, geoprocessing or editing. It becomes handy when you are editing the layer in separate Dataframe and avoid the accident of choosing the wrong layer and it’s feature modification. Also few layers on the Dataframe helps to navigate around and choosing the right layer.
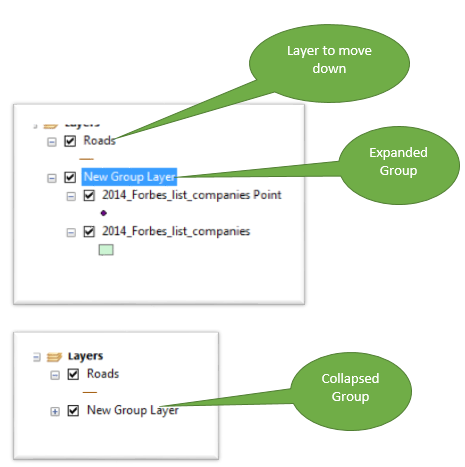
Second option is to select the layer and group them according to their related features. For example grouping the layer based on the feature characteristic or feature location or data source or some other relationship. The main thing is how it makes your job easier should be the way to follow it. Remember layers inside the group draw in the order they are kept in, read the step 3 to avoid overlapping of layers. Group containing mixed points, polylines, and polygons can be problematic. Be careful while reordering the layers or groups in the TOC, they might end up on the wrong group. So when reordering the single layer which is just on the top of the expanded group layer, first step is to collapse the group layer and then move the single layer.
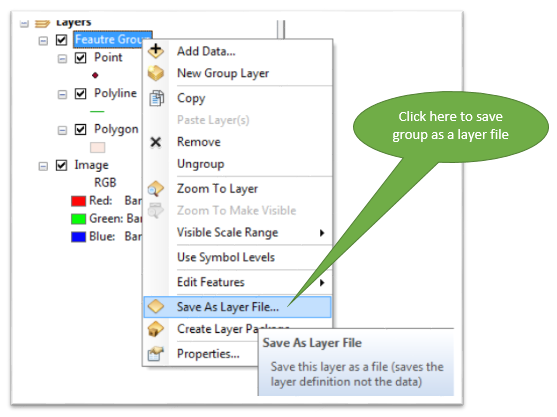
Tips: If you want to use same group layer on other templates then it is a good practice to save group layer as a layer file.
As it is said practice makes man perfect, playing in the TOC ones can find better option to reorganize the data, so please share if you have any idea that we can incorporate in this article.
Other Resources:
What’s New in ArcGIS 10.0 – The Table of Contents- YOUTUBE Video
Dealing with red exclamation marks in the Table of Contents

